Automatic plant watering system
I wanted to have an automatic plant watering system to keep my basil alive. Instead of buying a plug-and-play device, I decided to make my own one.
The plan
Here’s how I envisioned the device:

First, a disclaimer: I’m a beginner when it comes to electronics, so I assume my diagrams and wiring are far from perfect.
Anyway, I started by reading and watching some tutorials on how to deal with valves. Then I drew my initial idea for how the electric parts could fit together:

From some reading materials I understood that Arduino can be powered by a 12 V power supply, but it’ll heat up quite badly. I figured it’s better if a step-down converter heats up instead but thanks to it the Arduino gets a nice 5 V.
Each valve and the pump are ‘secured’ by a flyback diode in order not to fry the whole circuit when they get switched off.
The parts
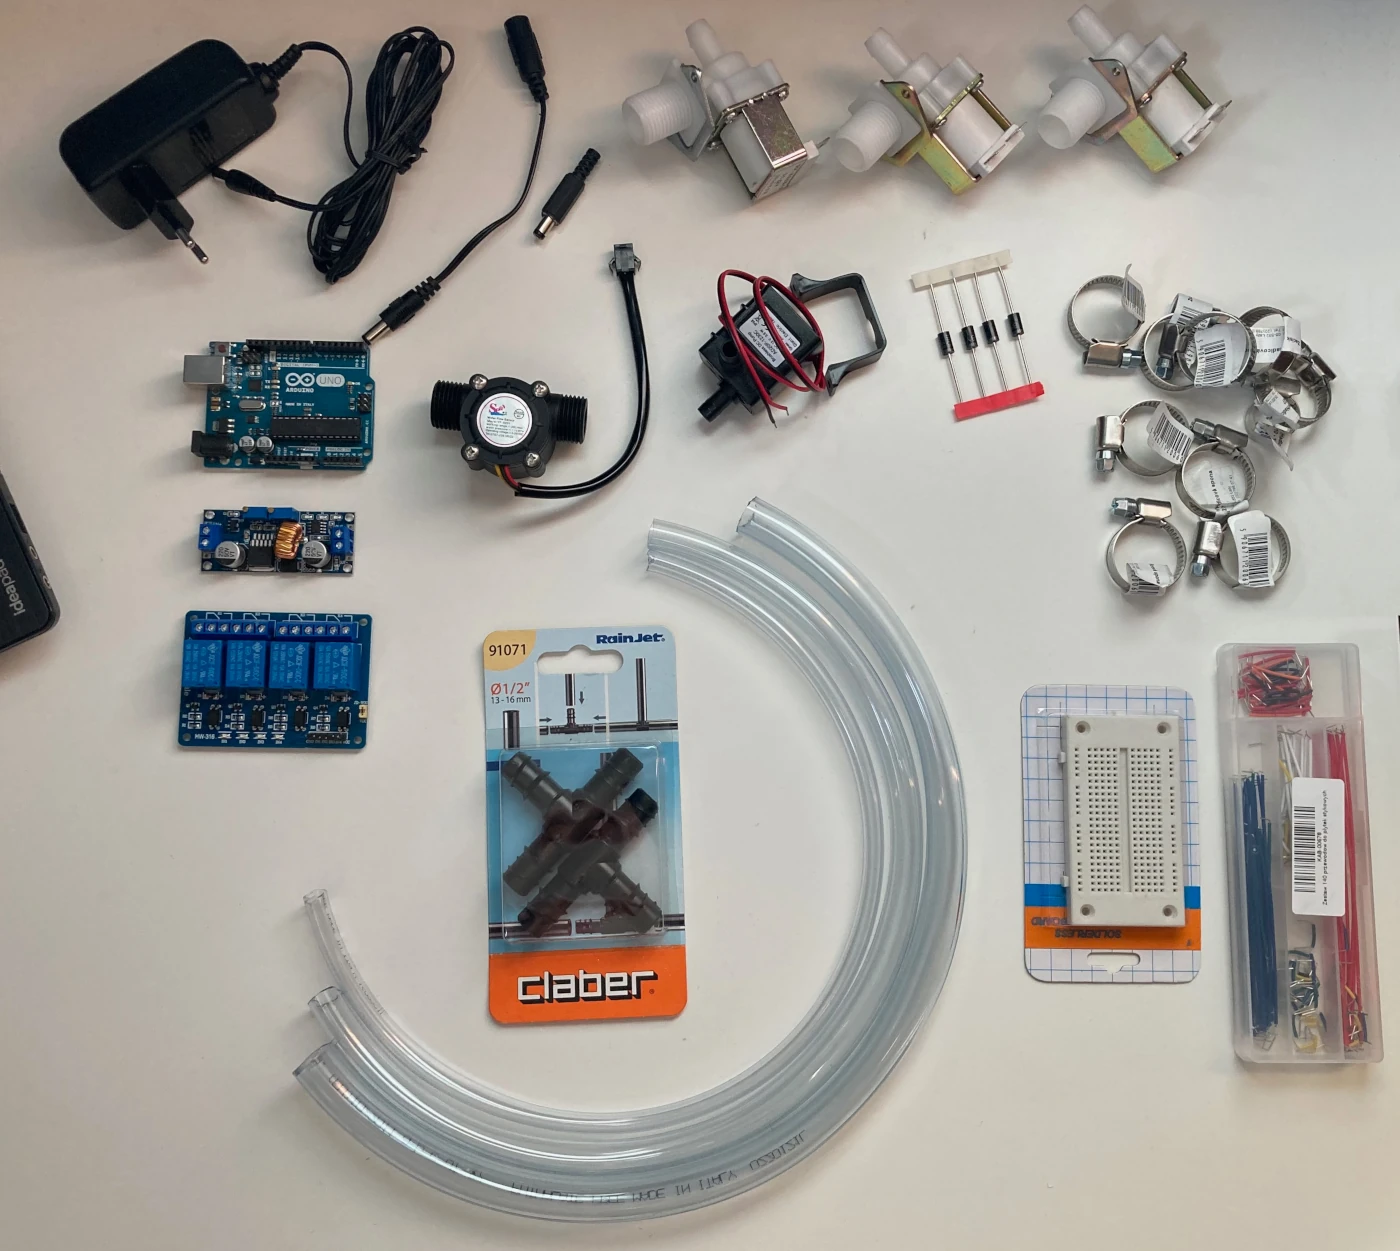
Here are the parts that I initially gathered up:
- Arduino UNO
- three 12 V valves
- a 12 V submersible water pump
- water flow sensor (I thought I’d use it, but then I dropped the idea as I was too lazy to include it in the system)
- 4x relay module
- XL4015 step-down converter
- some BY255 diodes
- 12 V / 2A DC power supply
- some 5.5 / 2.5 mm DC connectors
- 5.5 / 2.1 mm DC - 5.5 / 2.5 mm DC adapter
- some water hoses
- some water splitters
- some metal hose clamps
Assembling the hardware
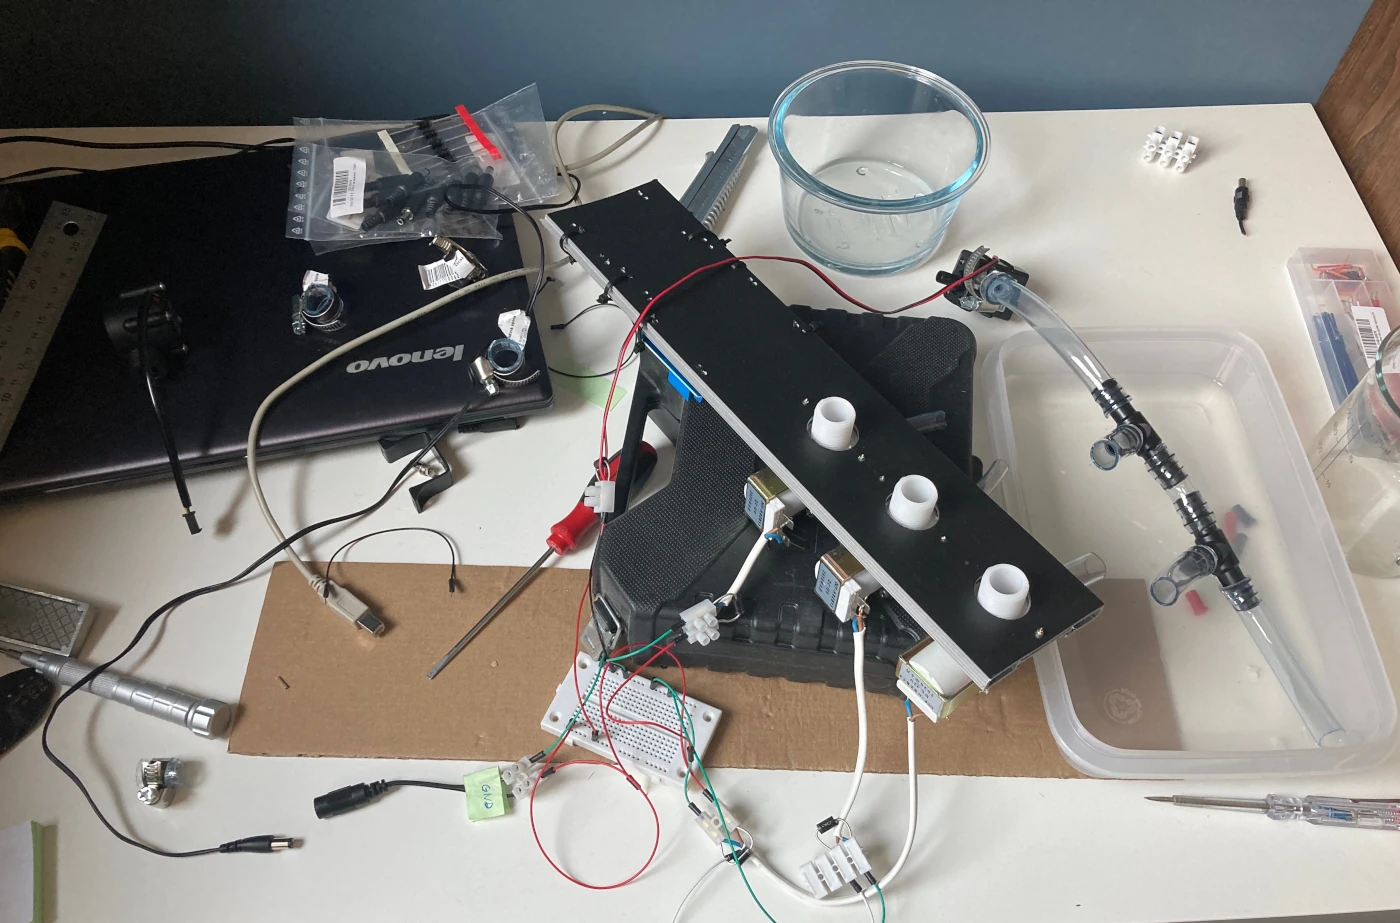
I fixed all the elements to a piece of a plastic panel I found in my basement. The step-down converter, the relay module and the Arduino are fixed underneath the panel (next to the valves), so you can’t really see them in the photo.
I wanted to use ⌀12 mm hoses for the pumps and valves. However, I had to connect them to the water splitters which were bigger in diameter. I had to use bigger hoses which could not be easily tightened on the ⌀11 mm connectors. I had to make some ‘adapters’. It simply meant putting a smaller hose into the bigger one. Only then they could be tightened with the clamp.
When it comes to connecting the hoses to the 1/2” valves, I bought some tap connectors which fit nicely to the setup.
Something I was not expecting is how tight these hose clams need to be tightened. I was worried that the plastic connectors in the valves and in the splitters are going to break, but fortunately it didn’t happen.
All in all, my initial shopping list didn’t include lots of hoses, hose clamps and other connectors which I later had to buy in the ‘gardening’ section of the local hardware store.
Wiring it up
Using some terminal blocks, the 5.5 / 2.5 and 5.5 / 2.1 mm connectors I split the power supply between the valves. the pump and to the step-down converter.
The step-down converter has an output range of 1,3 V - 36 V and has to be manually adjusted to 5 V using some tiny potentiometers. I grabbed my multimeter and - by trial and error - found the right setting.
The code
It’s a simple loop over three pins:
- switch
pin N - switch
pin <water pump>on - sleep for three seconds
- switch
pin <water pump>off - sleep for one second
- switch
pin Noff
Waiting for one second after the pump gets switched off is done in order to allow some remaining water to still flow through the valve.
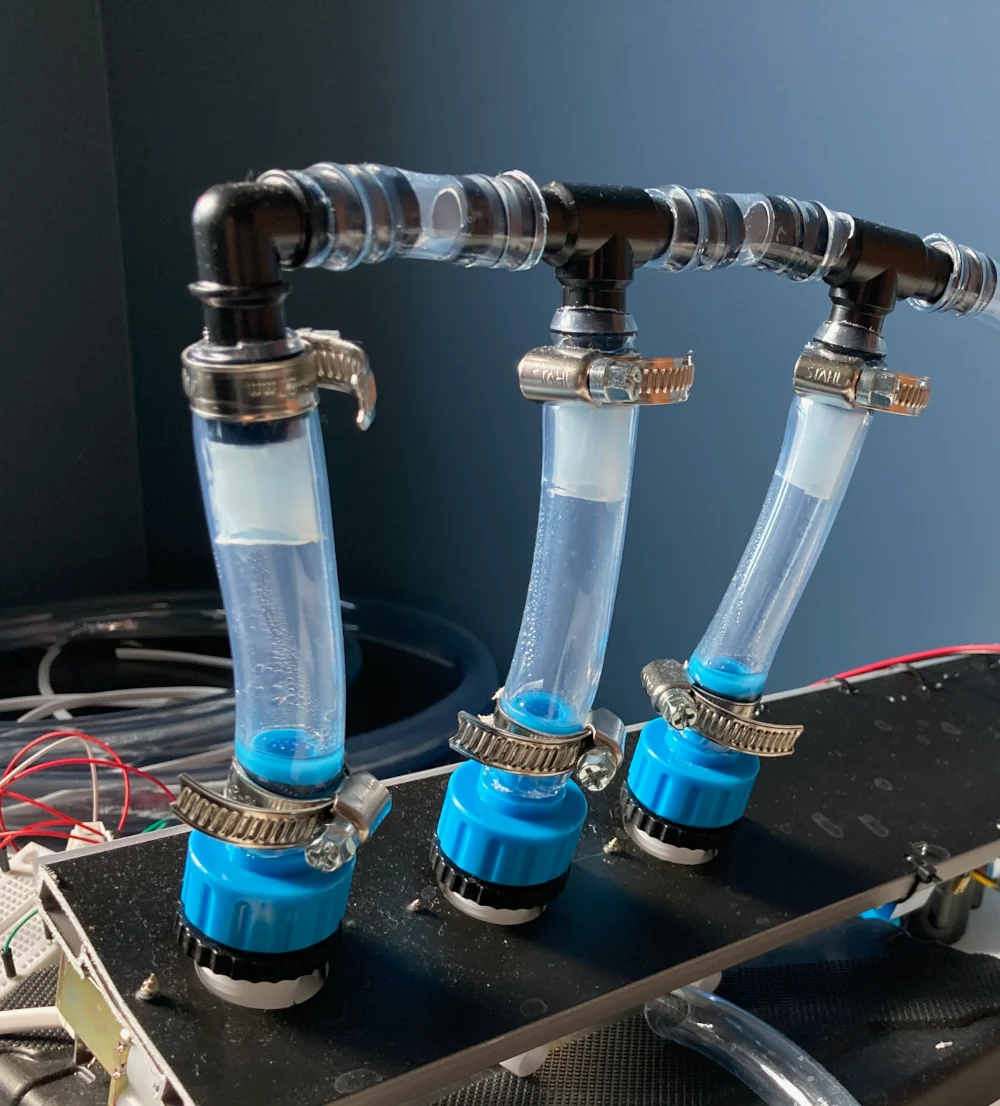
The working toy
Summary
It works. However, I’m not using it in my home garden. It’s too ugly and too big to fit anywhere in my kitchen. However, I’ll consider working on it to support a bigger scale operation like a garden if I move someplace where I can install it outside.
I still keep forgetting to water the herbs in my kitchen.
Lessons learned
- why, when and how to use a flyback diode
- got familiar with the ‘gardening’ sections of my local hardware stores